
posted by on April 26, 2026
It has been a little over a year since I first started handbuilding abstract-shaped dinosaurs out of clay at the local pottery studio where my partner is a member. It began with this one piece that a friend of the owner had made and we all coveted.
At a friend’s birthday party at that same studio, I decided to try to handbuild a similar long-necked dinosaur. It’s such a small object, after all. How hard could it be to form such a tiny amount of clay into the right shape?
I was immediately humbled.
After hearing my partner and the studio owner talk about how much they loved and wished they could steal that original dino on the shelf, I decided to try again with more of a plan.

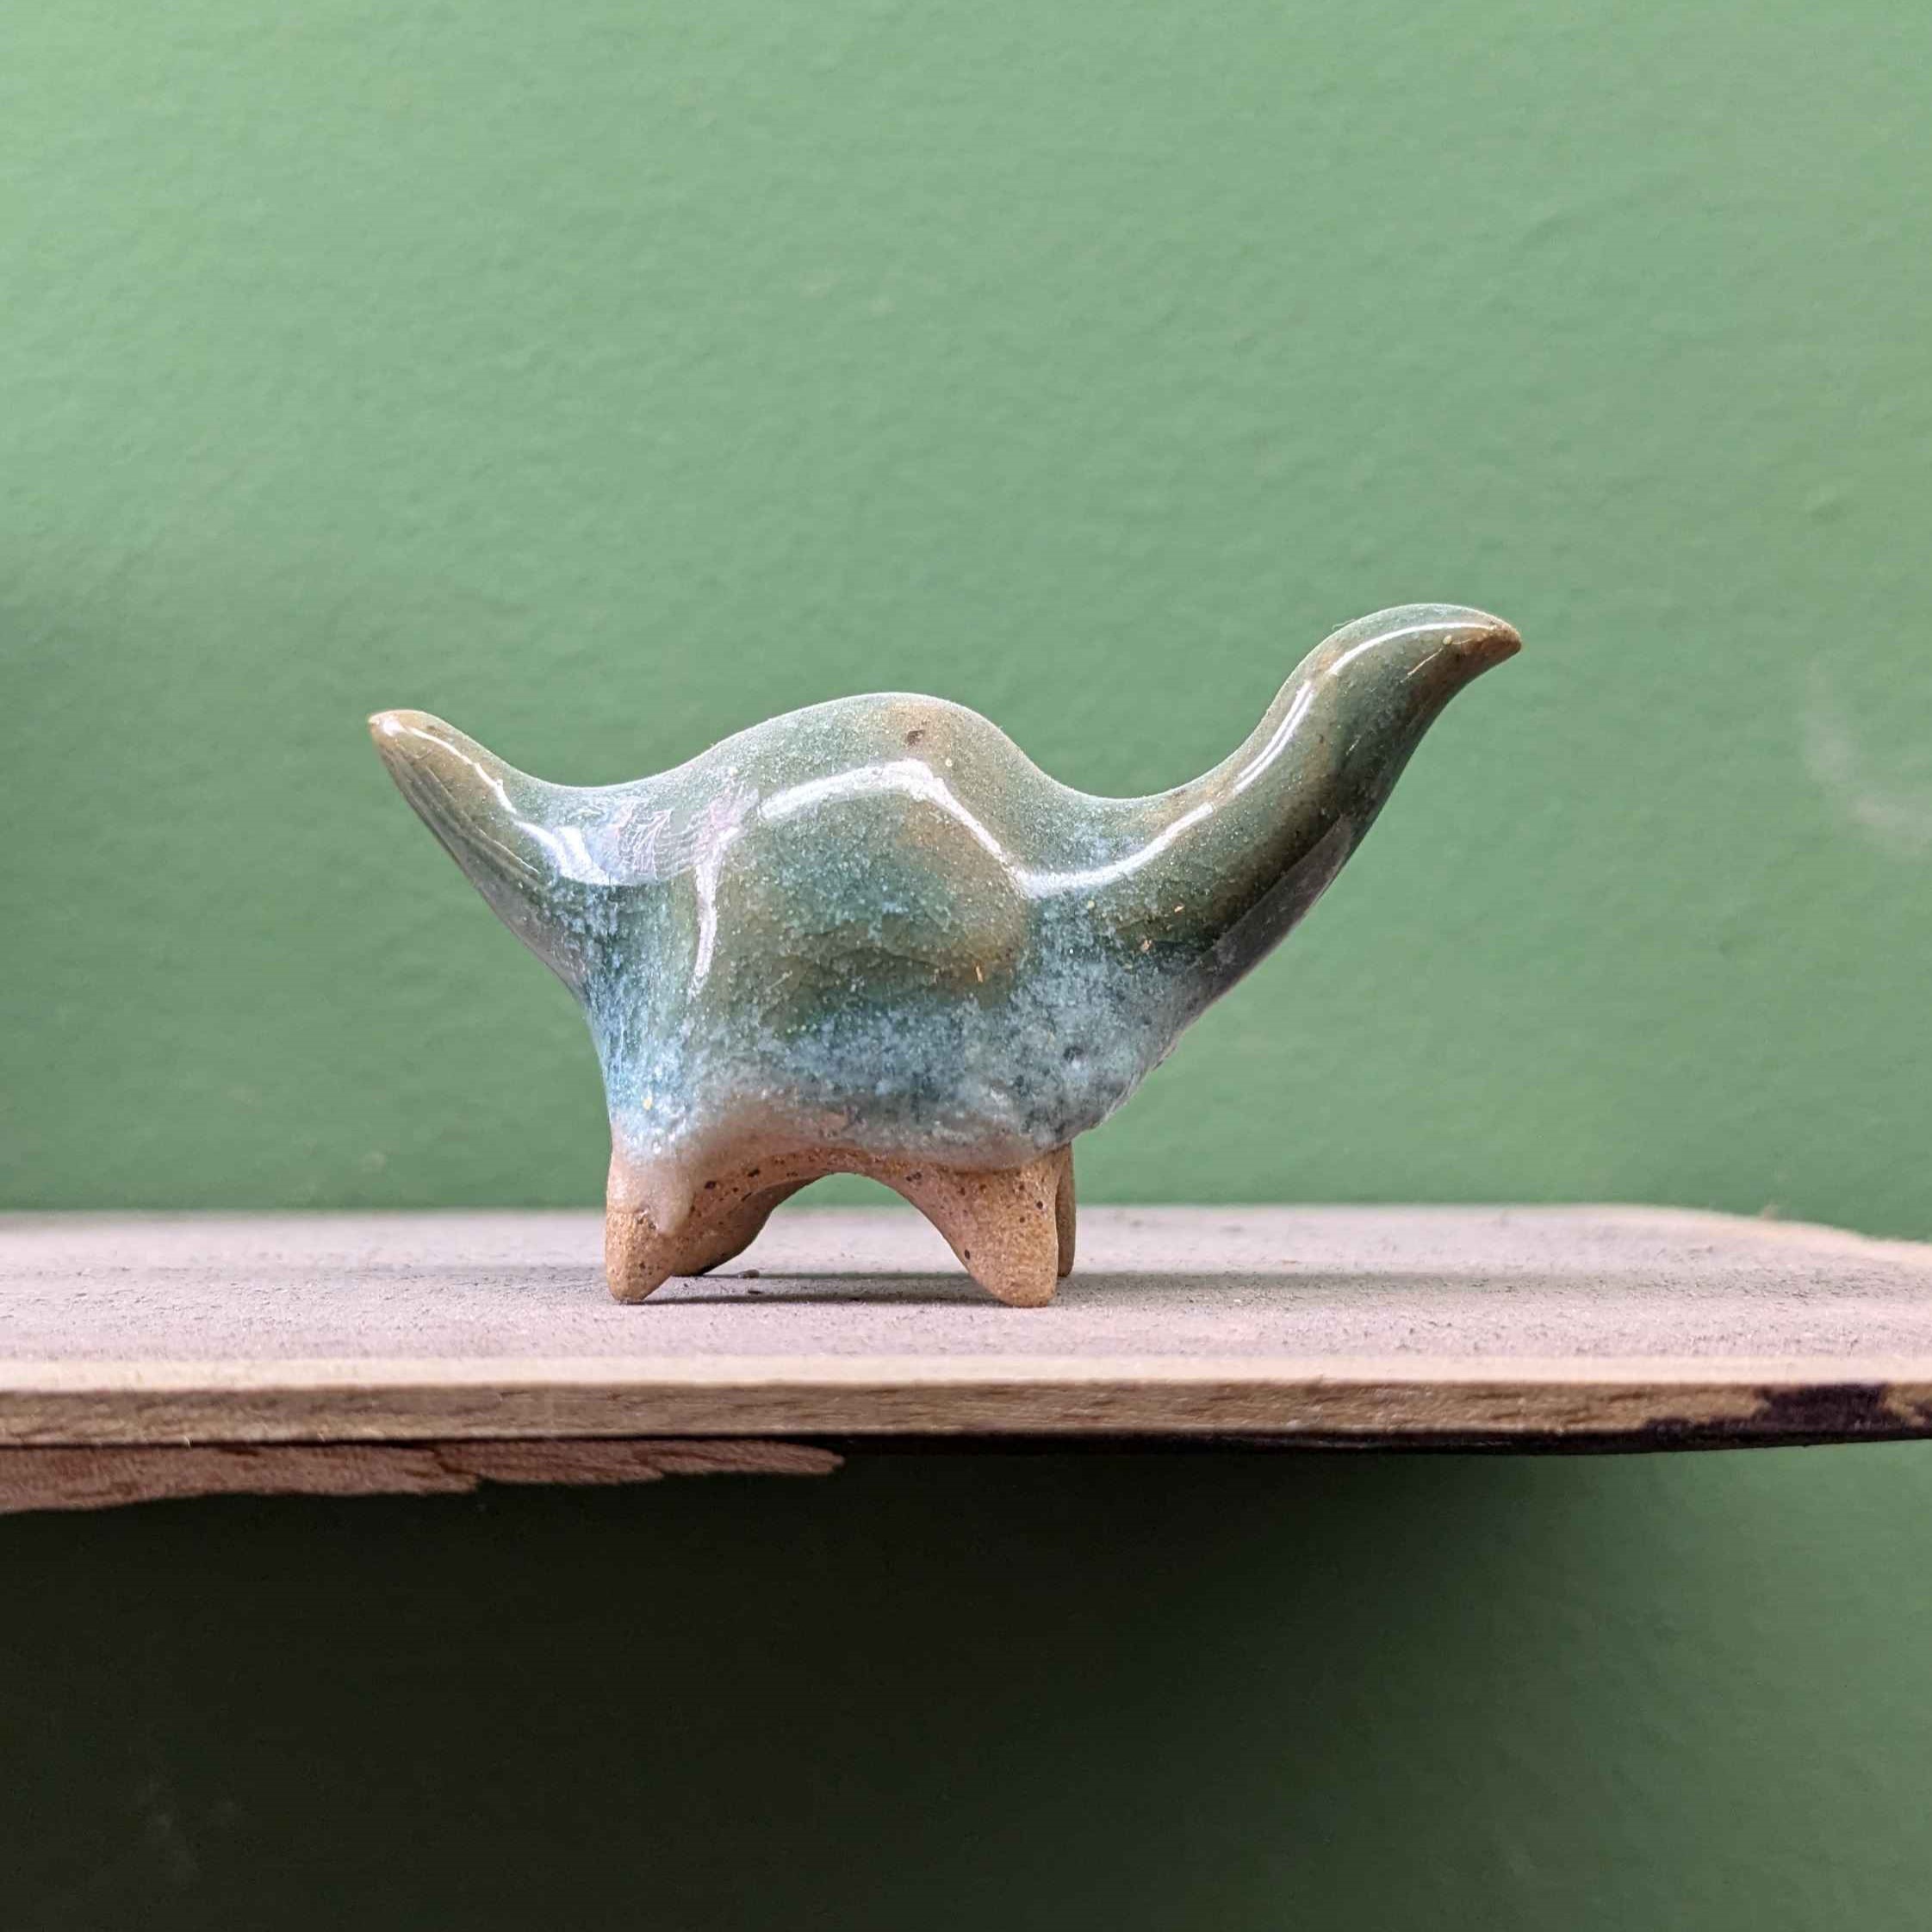
I rolled some speckled clay into an oval and used a needle tool to cut out the spaces betewen the legs. I pinched the legs out into longer points and then gently tapped the body feet-side-down until the feet flattened out into cylinders from cones. I rolled out a cone that I attached in the back for a tail and a long cylinder that I squared off and attached in the front for the head. All the while, I always made sure the joins had been slipped and scored.1 I noted that my piece had much squarer necks that were raised much higher than the original, but I liked this look more. It felt like it gave them character. With some testing, we were able to determine the original glaze combo to get a little bit of the crystalizing blue and white color to come through over the green.
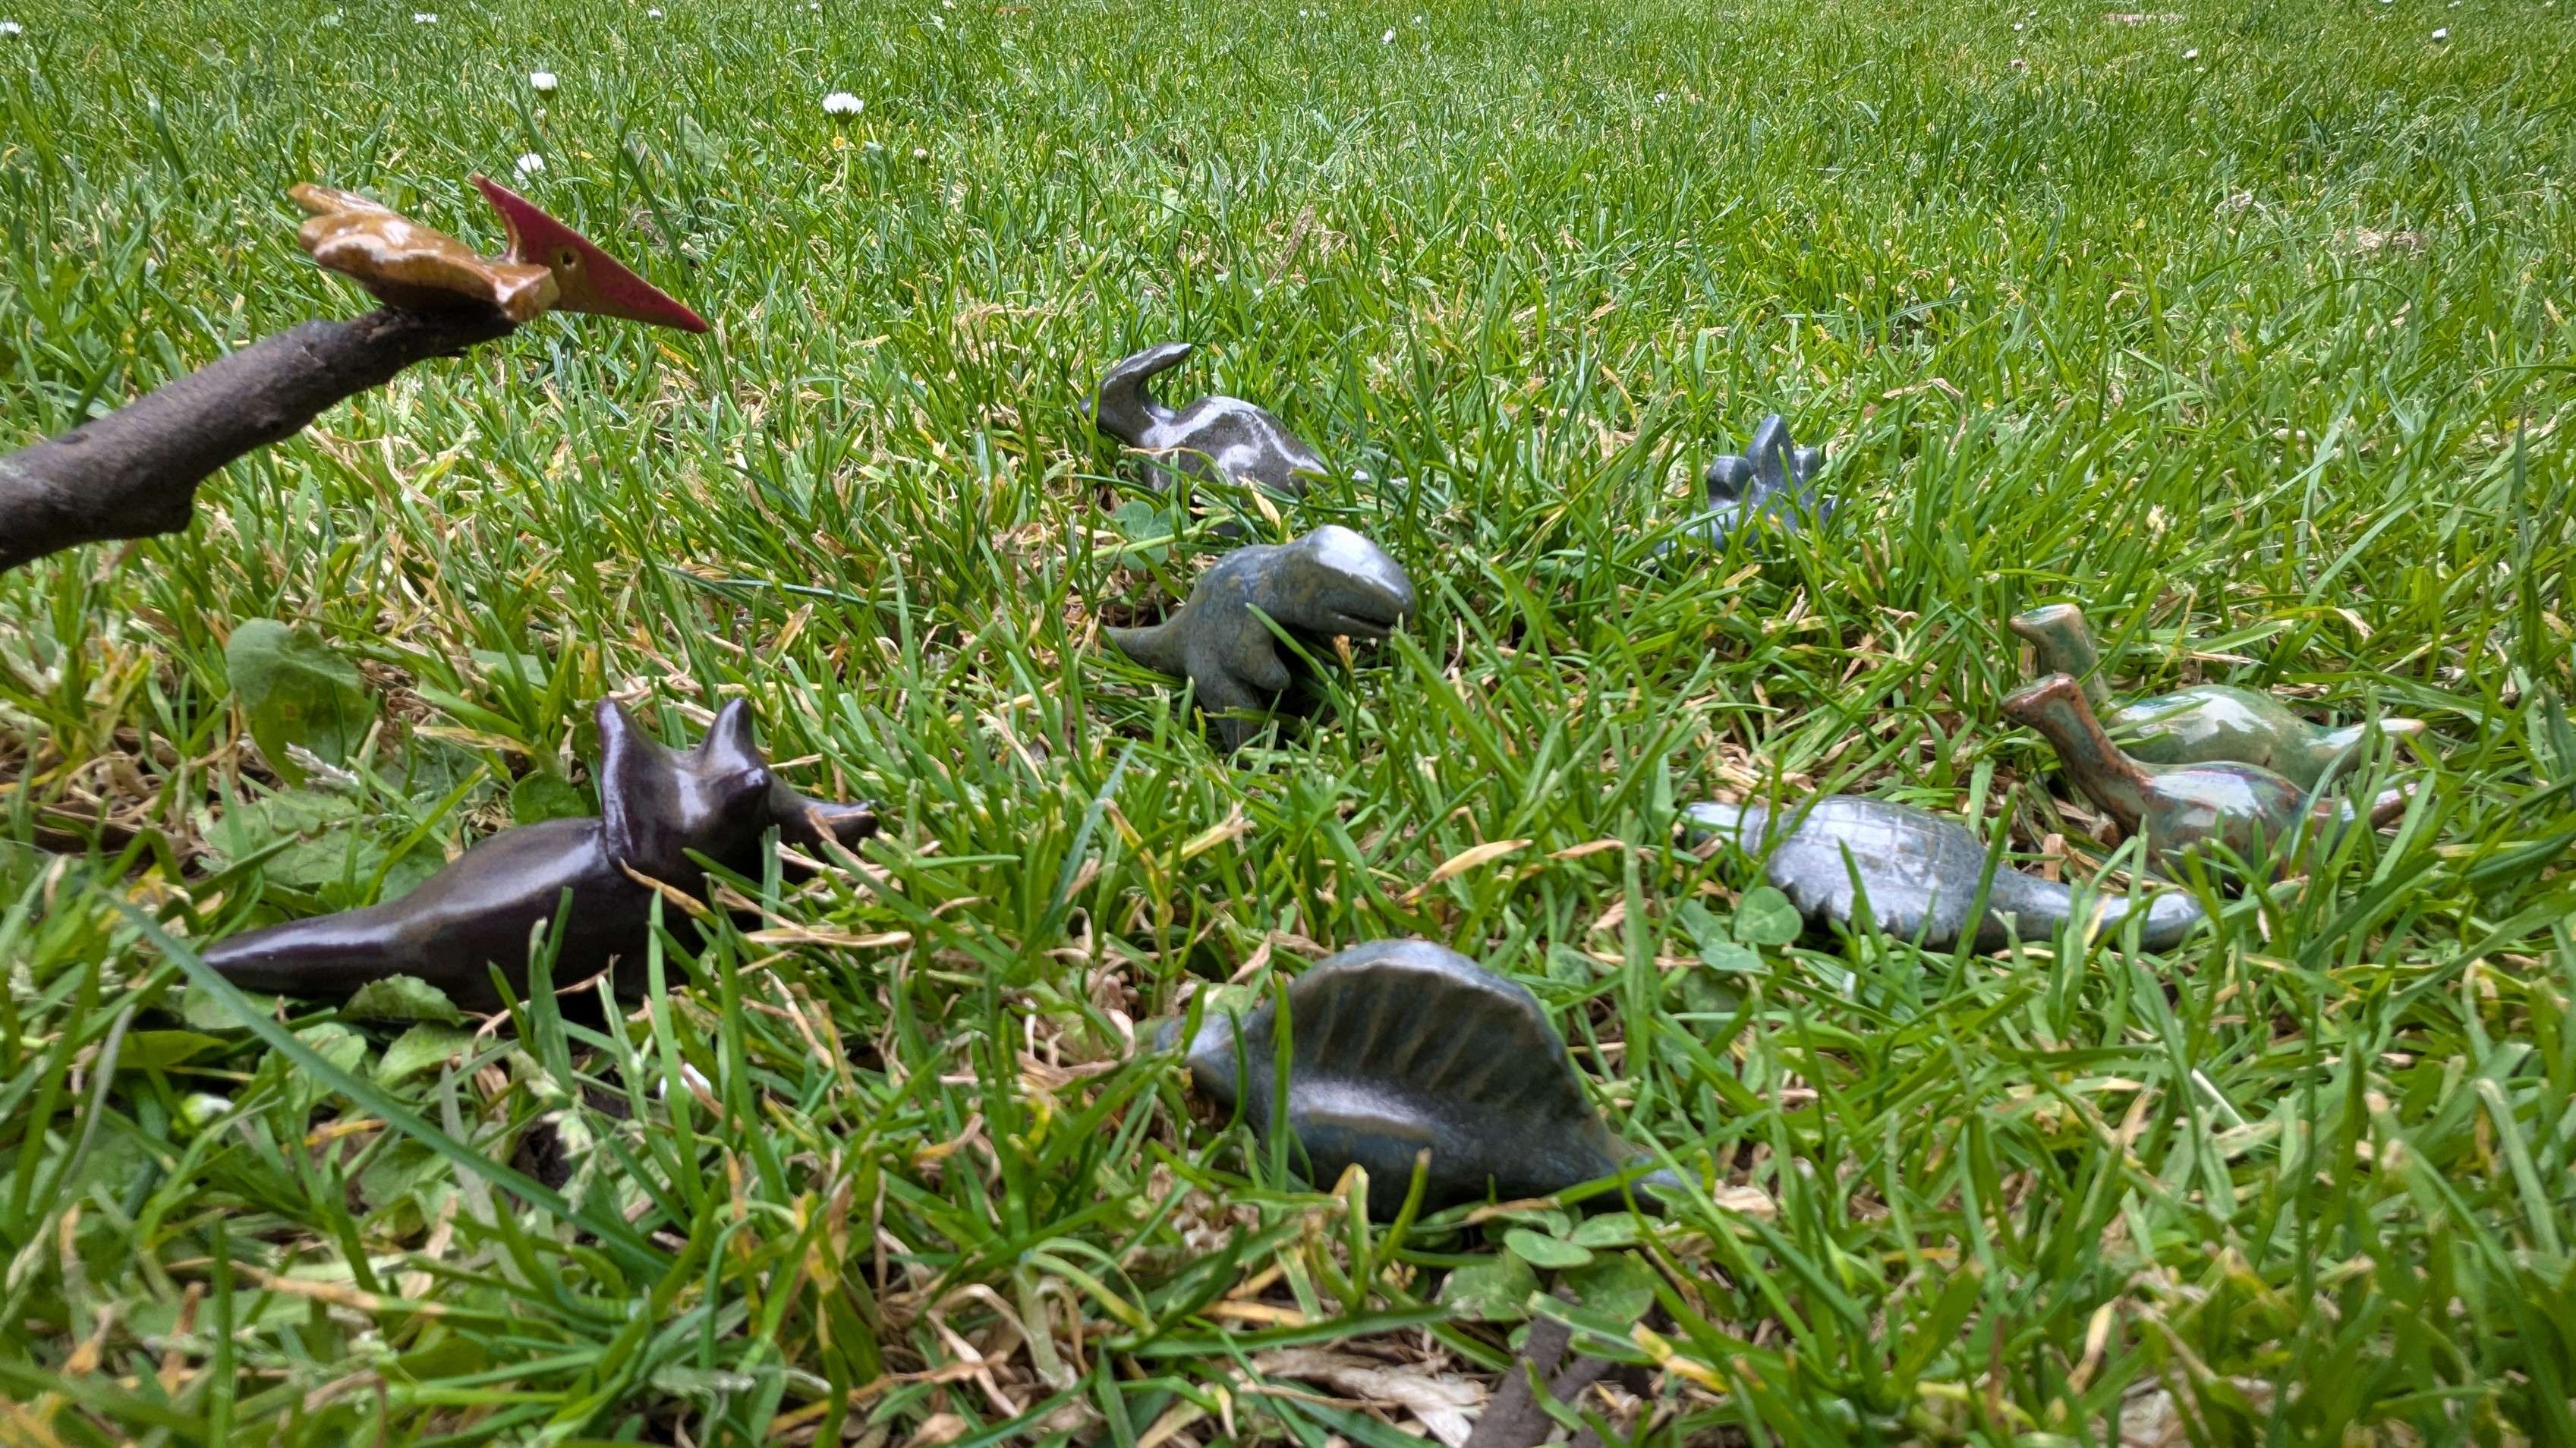
I was so inspired by how this first brontosaurus pair came out that it kicked off a long string of additional dinosaurs of varying kinds2. I did about a dozen brontosaurus pieces and gave some of them away to friends in the area during special occasions. Around when I was starting to get bored of making only one kind of dinosaur, one of my partner’s dearest friends from grad school visited. I just-after-she-left remembered an inside joke we had about pterodactyls, and went back to the studio to make one to give to her the next time we got to hang out.
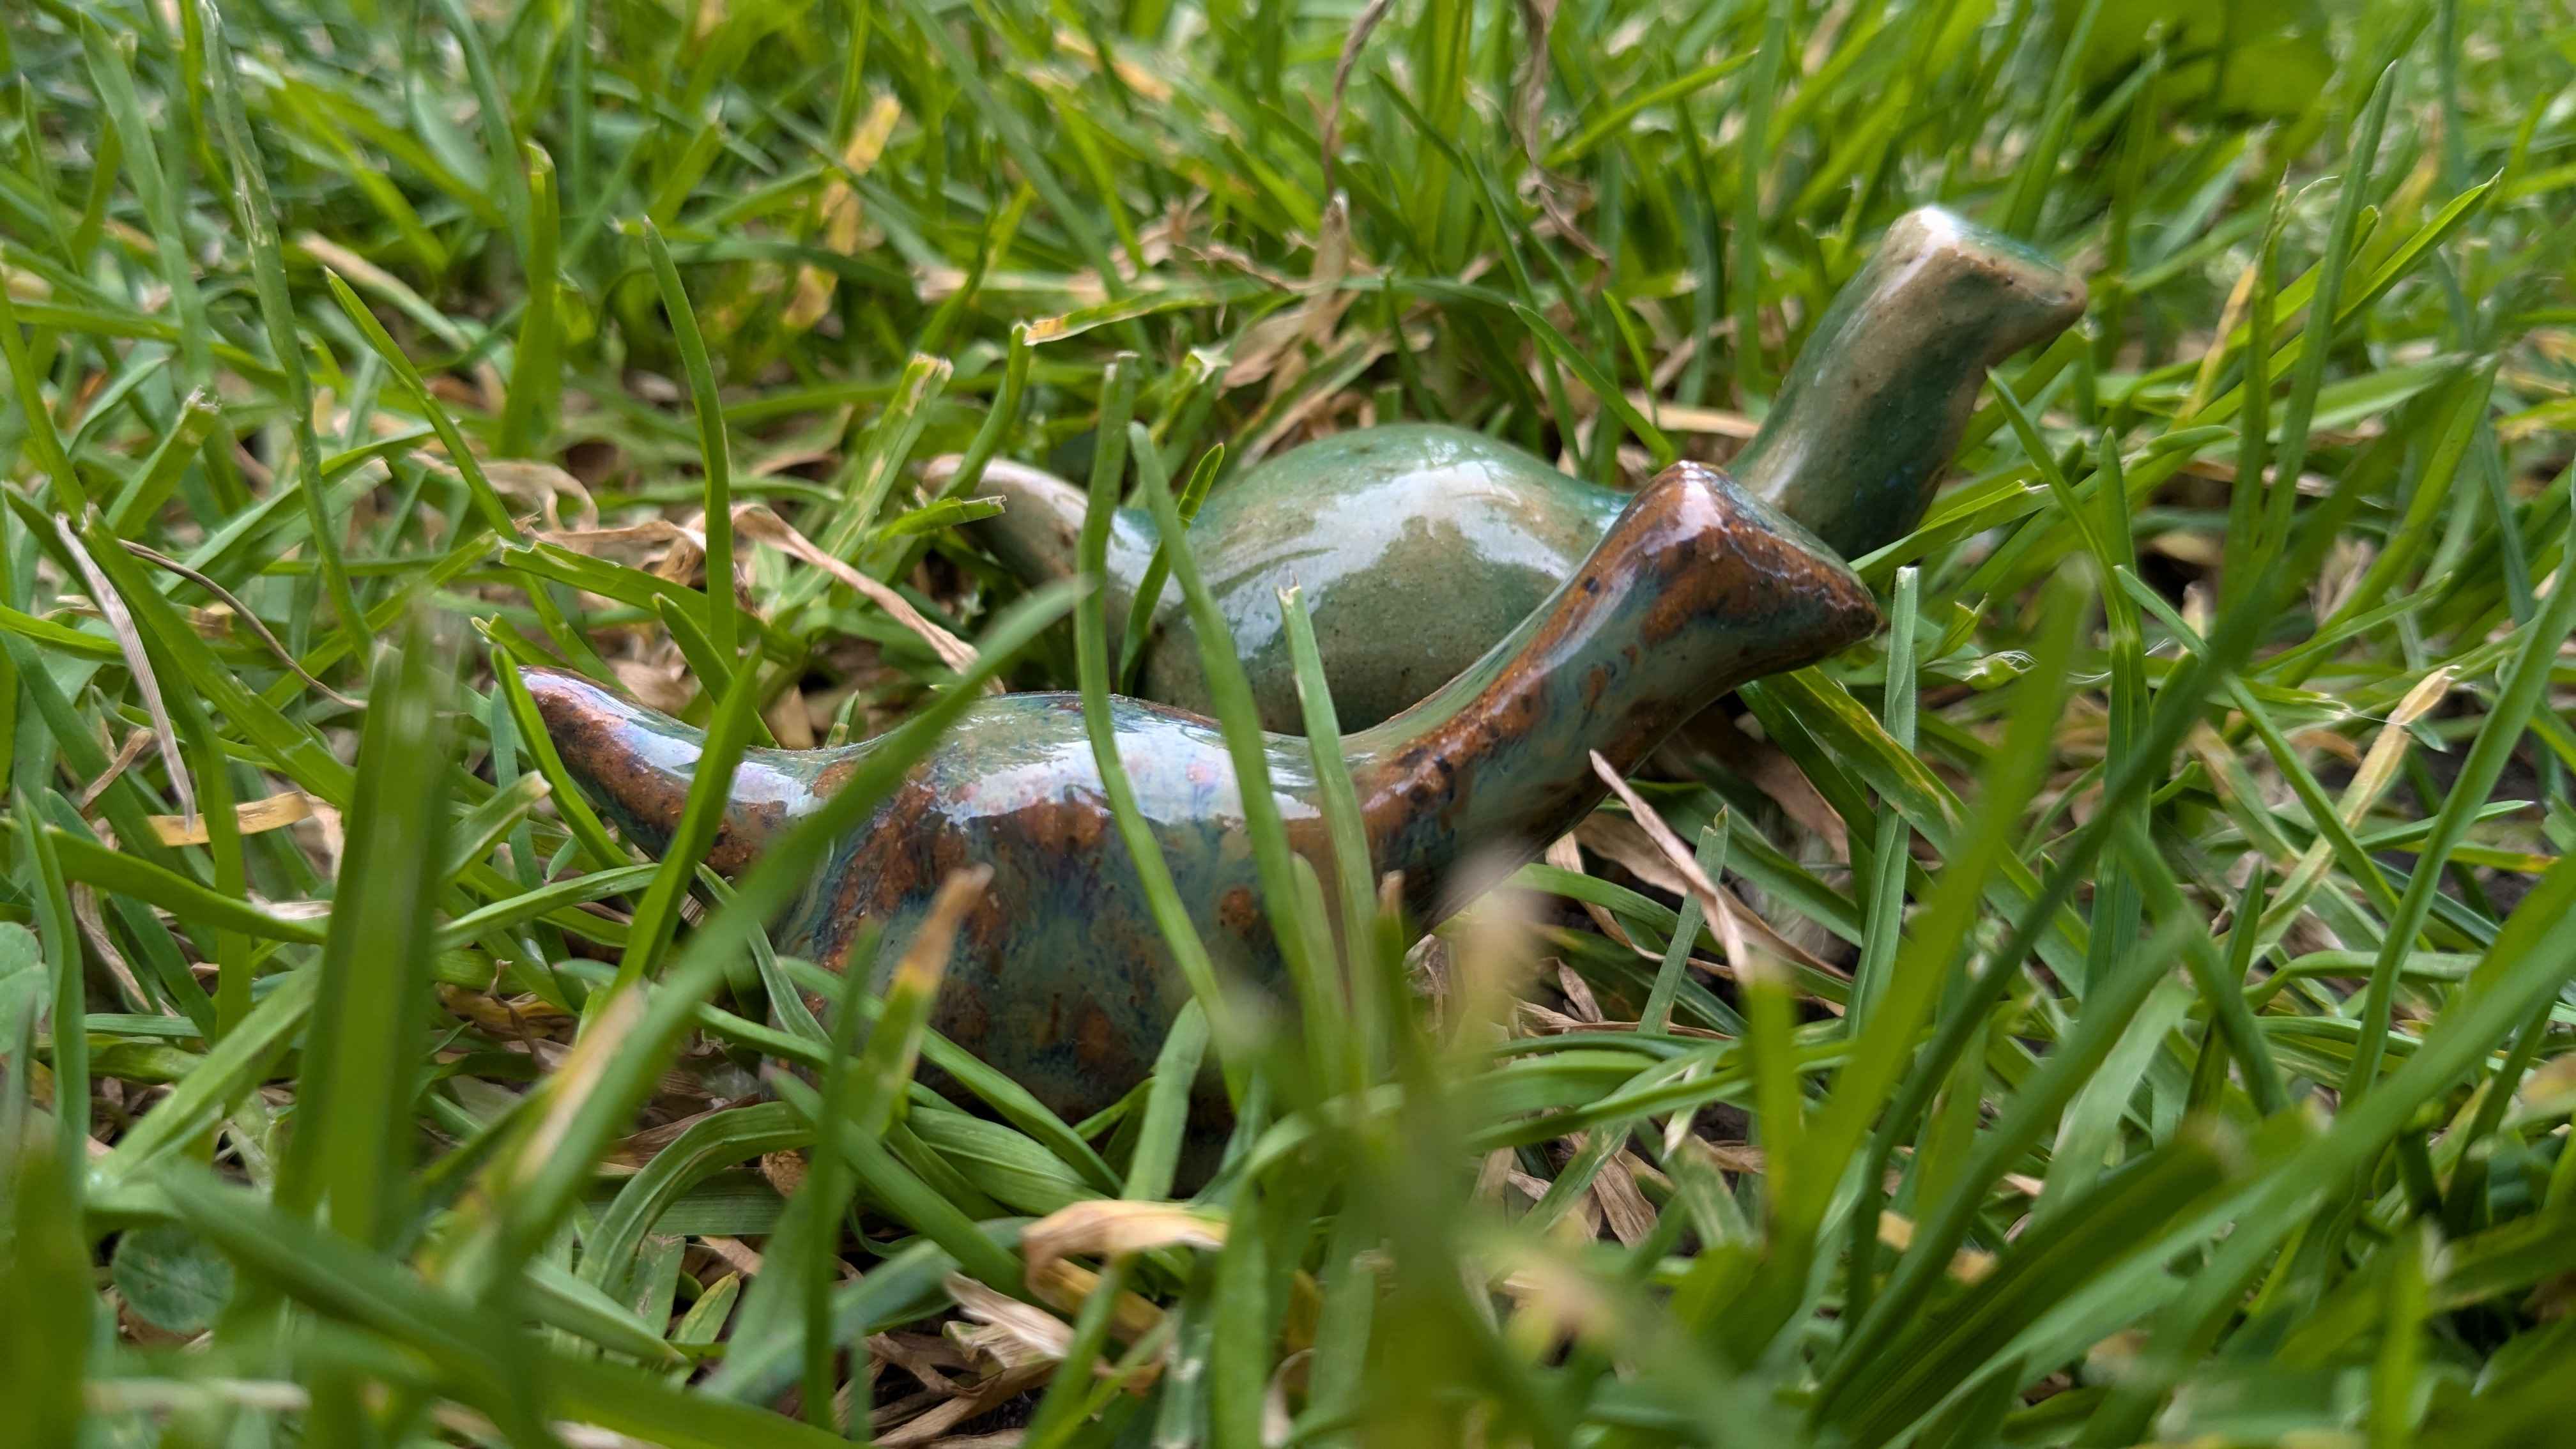
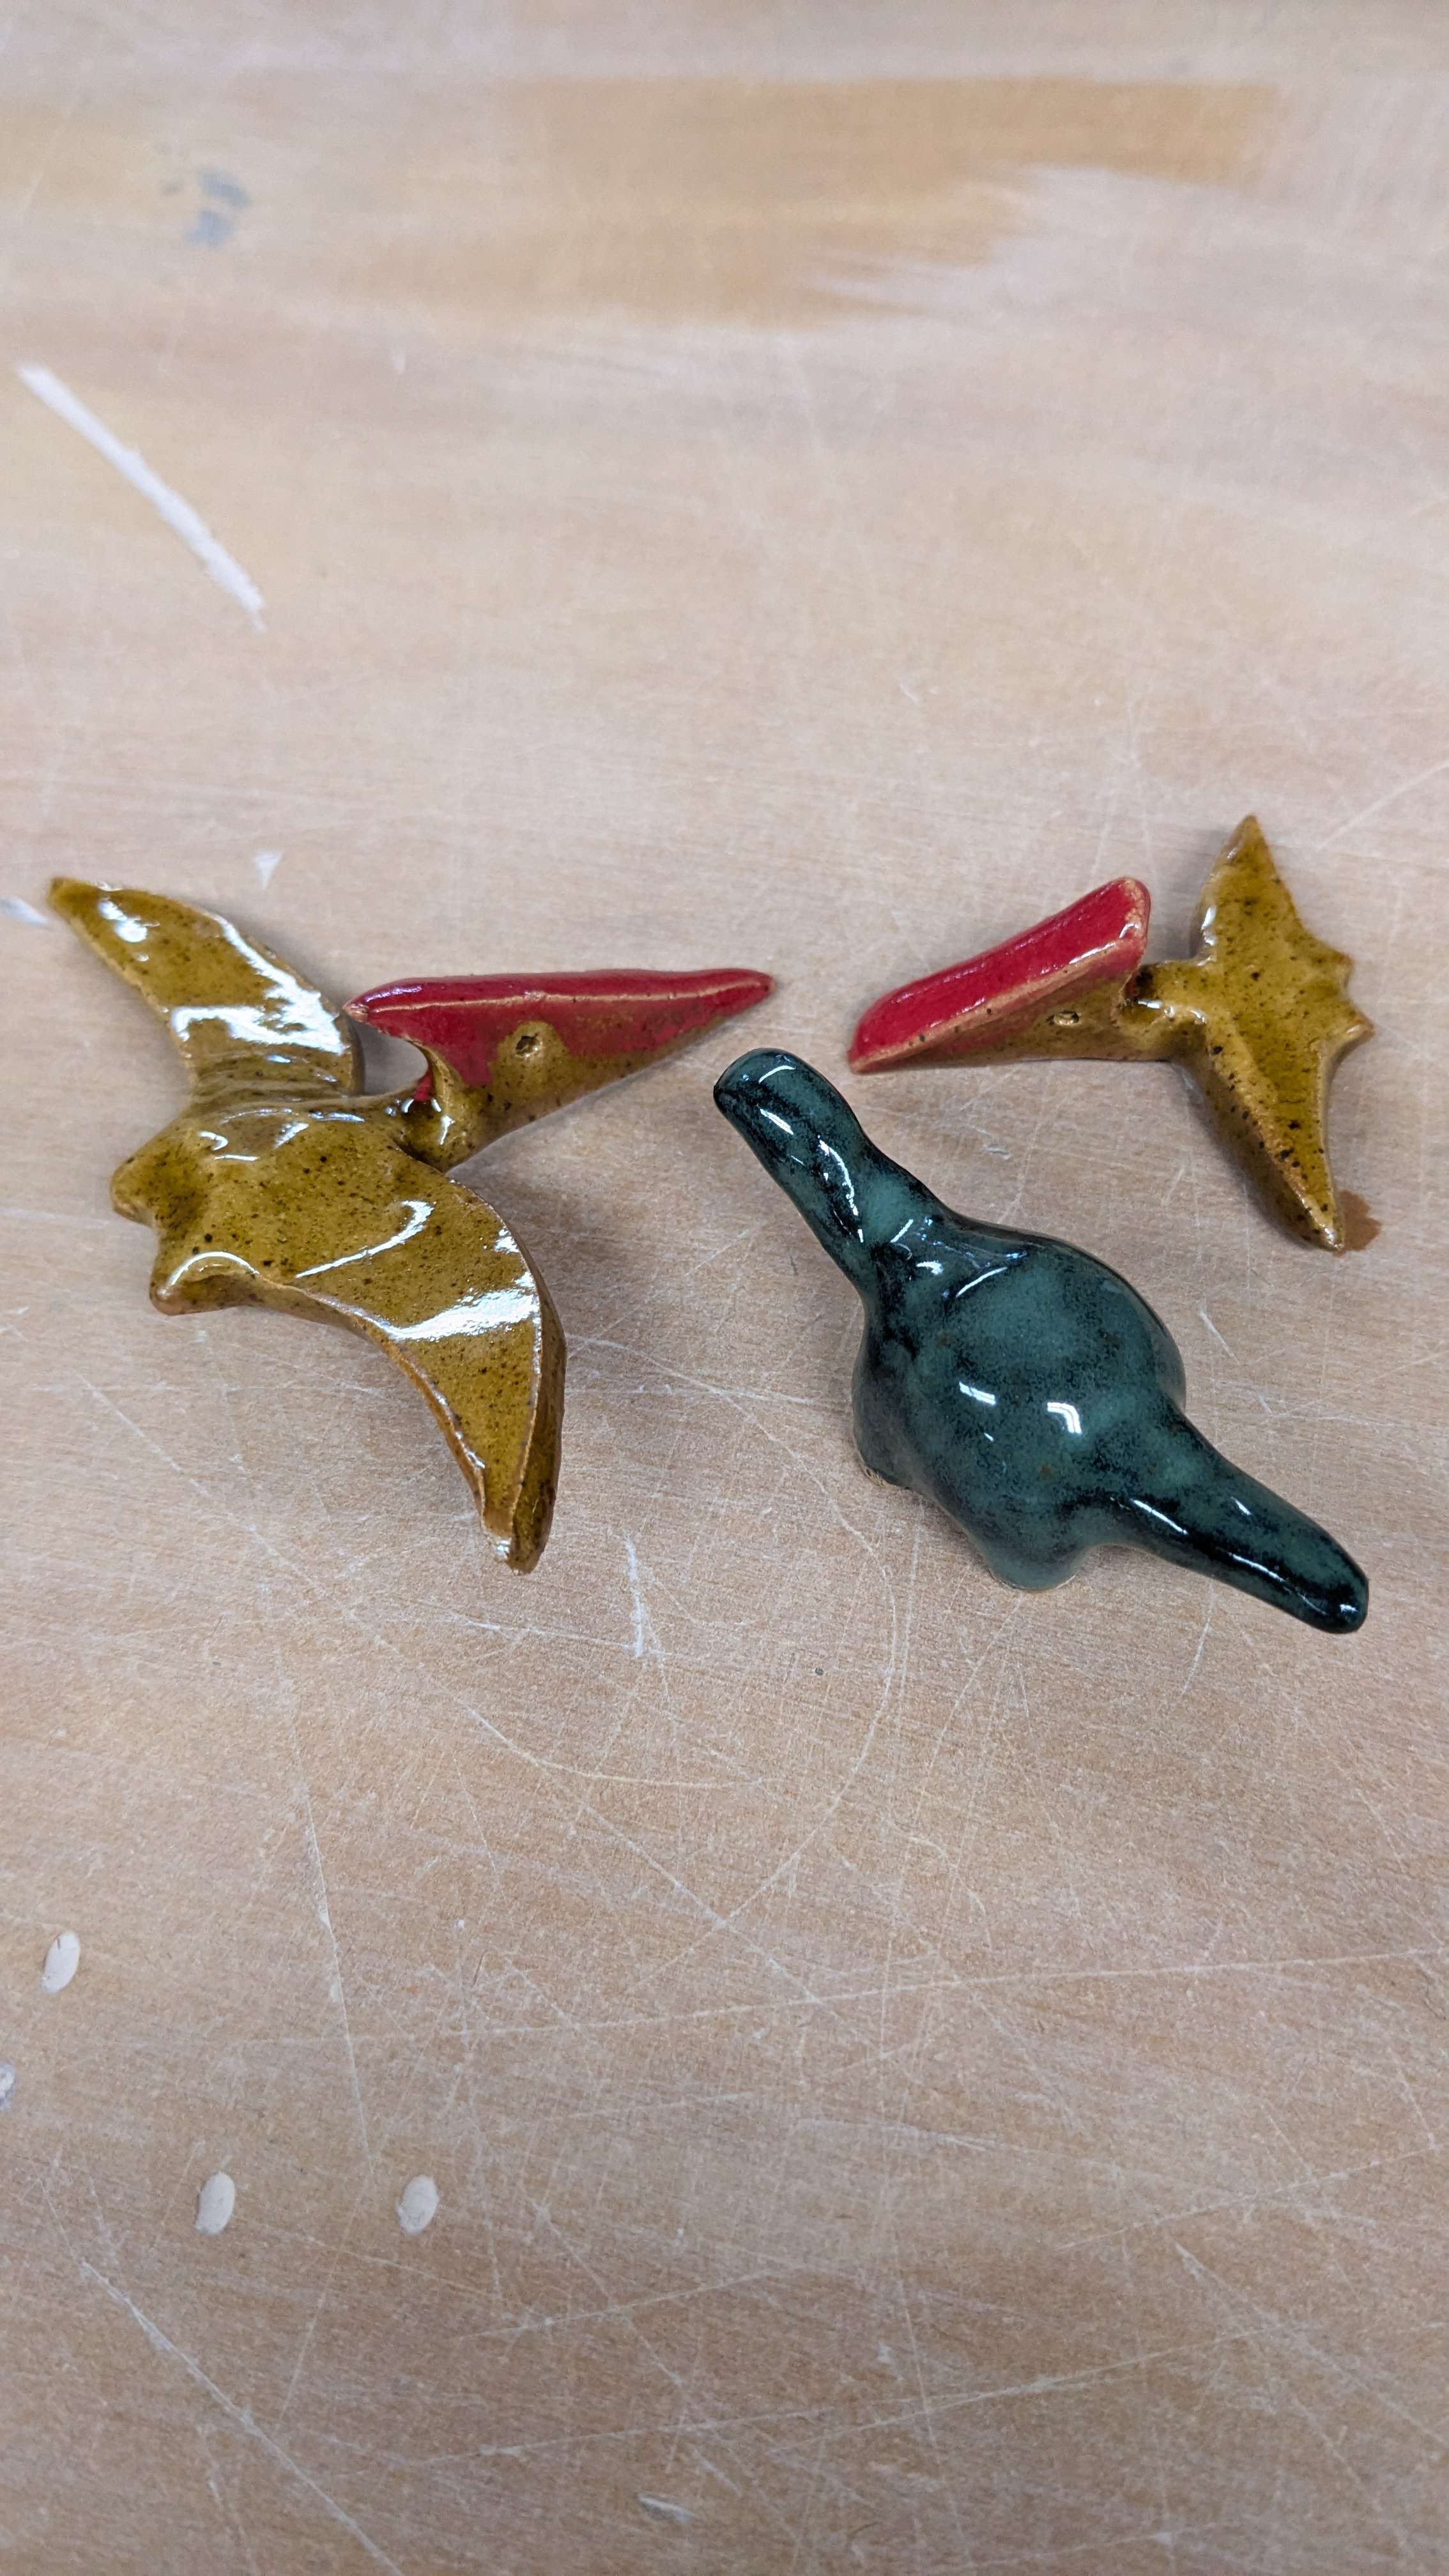
Whenever I fired a brontosaurus in a glaze kiln, it would stay standing up on its own four legs. All I had to do was leave the feet and a tiny bit of the ankles bare, and it would keep the remaining glaze from dripping onto the kiln shelf3. Because a pterodactyl isn’t a quadruped like a brontosaurus, I couldn’t take the same approach. I wanted the entirety of the wings to be covered in glaze, but even if I kept the bottom belly glaze-free, there was no telling which wing the pterodactyl might accidentally roll onto inside the kiln. To avoid this and to allow myself to glaze the entire body, I bought a special pottery “bed of nails.” Mine is a hexagonal stone with toothpick-thickness nails sticking up a half-centimeter out of it in a hexagonal lattice pattern. Because the points only have minimal contact with the piece resting on them, it’s easy to break the piece free from the nails by hand. My partner already had some diamond sandpaper for wet-sanding4 to finish the bottoms of pieces and avoid scuffing tables and bookshelves. I had previously used those on the feet of the brontosaurus pieces I had made as well. I found that sanding the pterodactyls after they were glaze-fired on the bed of nails produced a smooth finish with only minor dark spots on the bottom where the nails had touched the piece. Given the speckled body, these were hardly noticeable at all.
While creating the original pterodactyl, I also realized that I could simplify the forms even further and make the pieces even smaller by just cutting out the scalene triangle head and the flat body from the same slab. Joining was a bit treacherous with such little pieces the first couple times, but I learned a method for careful slipping and scoring on small bits that has worked well. I tested these even tinier pterodactyls out and found them to be delightful, and the ease of making them stopped me from doing any more at the larger size.
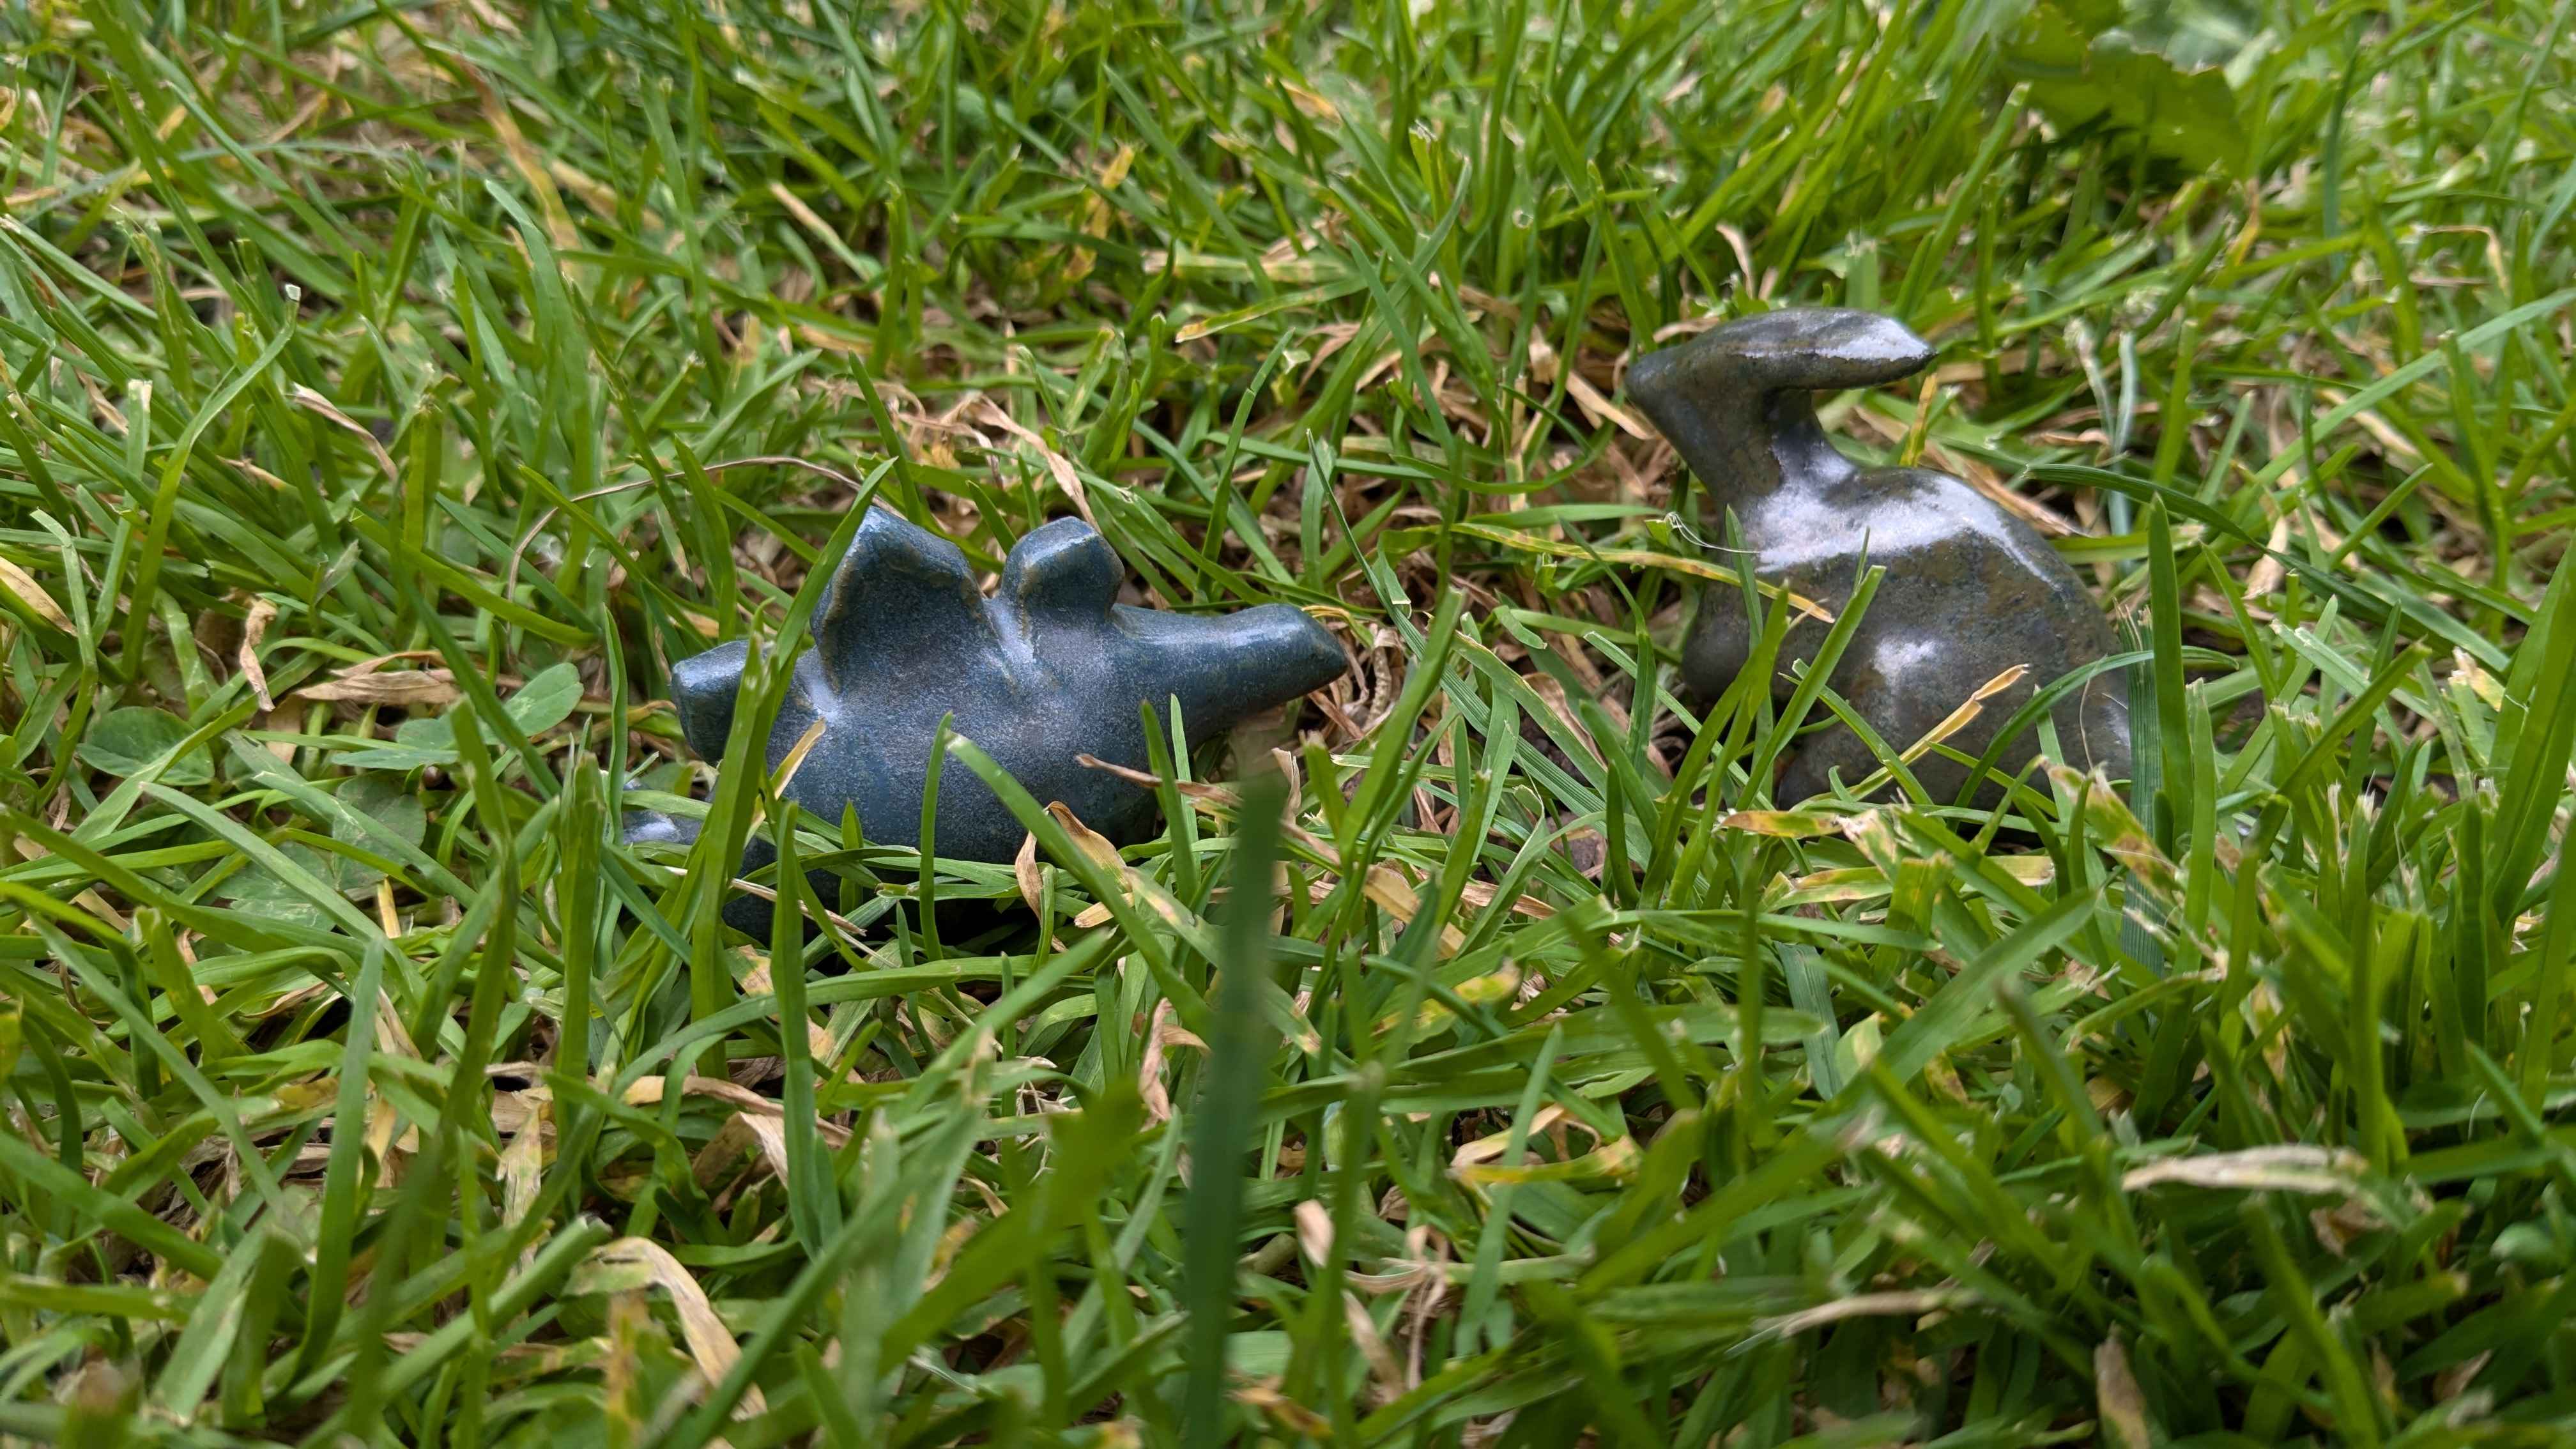
From there, I tried to come up with some classic types of dinosaur shapes to try. Rather than consider every species I was familiar with, I would try to embody the higher-level group or clade or family or something. Given that the details were mostly smoothed out on my pieces, it would be hard to tell two closely related species apart anyway. I thought a lot about what the silhouette designs of dinosaur groupings looked like, and one in particular stood out to me: the stegosaurus.
Where I could rely on existing pottery reference for the original brontosaurus and I had an intuition about the pterodactyl being able to be cut mostly from a thin slab, I was less certain of my approach for some of the others. I thought maybe I could simplify the dorsal plates into only a trio of differently-sized pentagons. I did my normal brontosaurus body for the legs, and then I dug slots in the back to insert tall pentagons cut from a thin slab. These pieces fit in like a sort of clay mortise-and-tennon with the remainder sticking out as the dorsal plates.
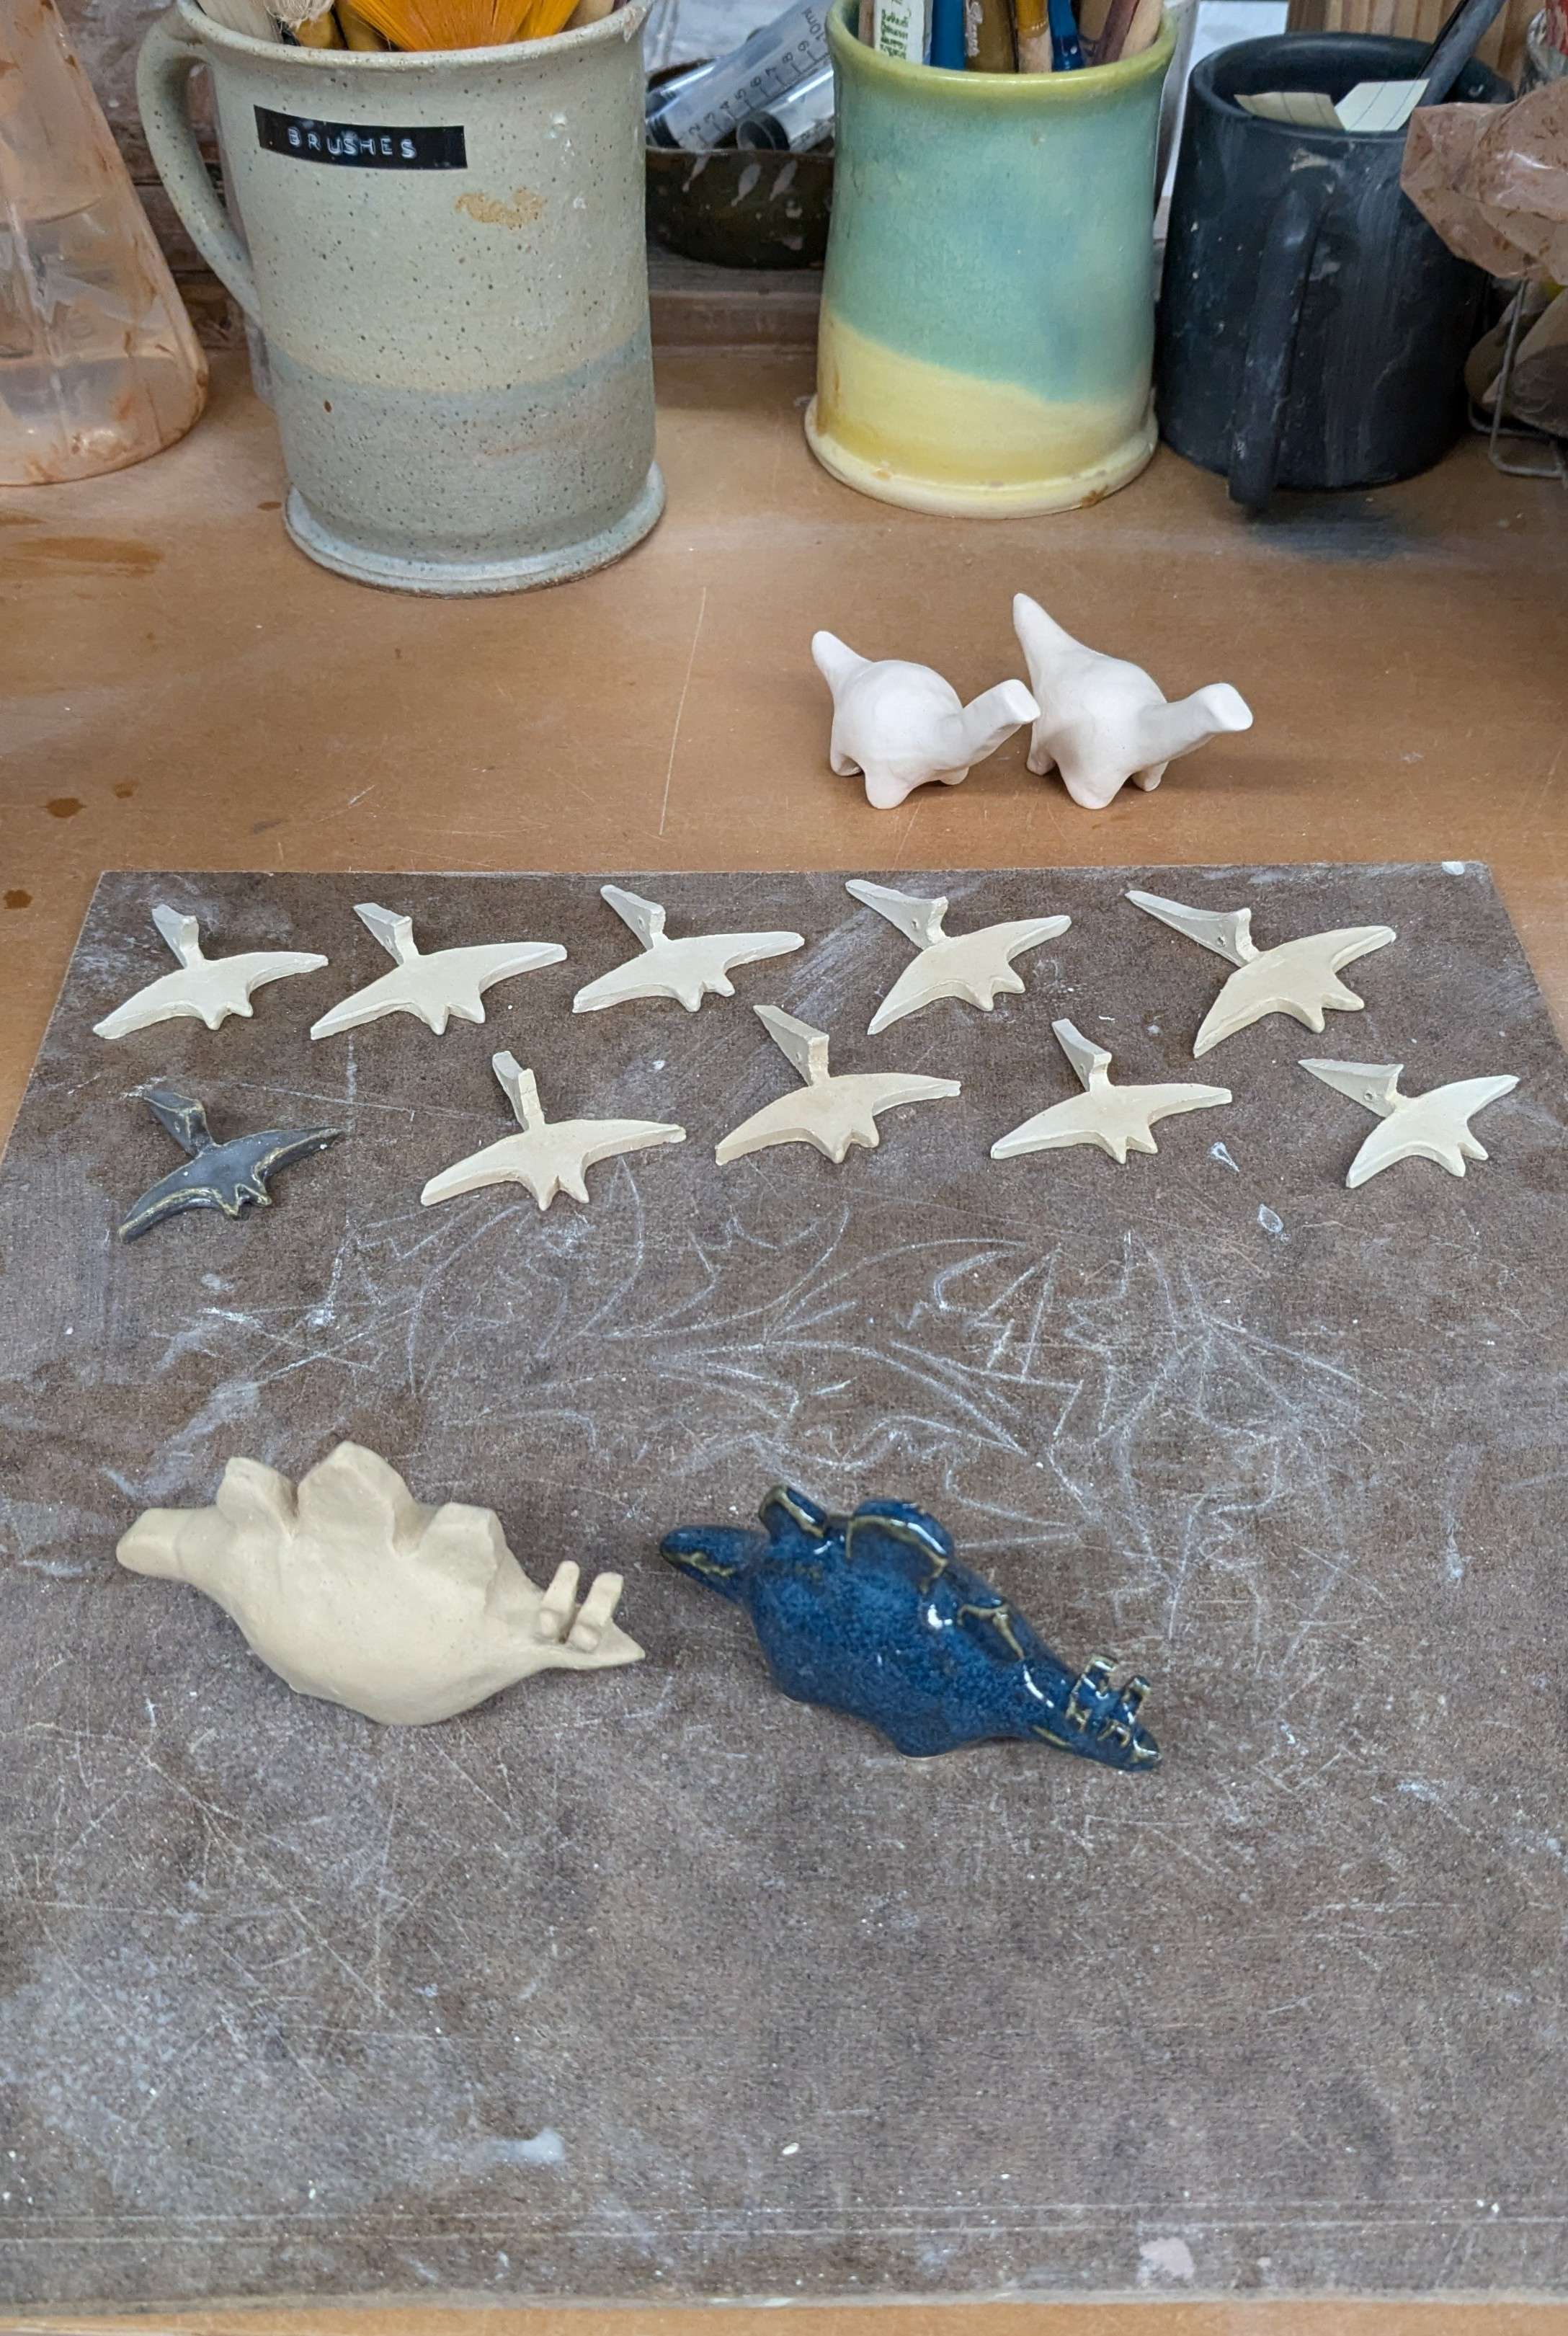
This process was cumbersome, took forever to slip and score correctly, and wound up looking particularly blocky in the way it joined to the main body. I learned from it and in the next attempt, I took a different approach: I started with my regular oval for the body, and used a bit more clay than I needed. I pulled one side of it into a thin slab sticking out of the rest of the body. From this slab, I cut the shapes that I wanted the dorsal plates to be and removed the negative space. This method allowed the dorsal plates to be shaped exactly how I wanted and already be joined in place with smooth blending between them and the body. This was much faster than my original method, and I liked the look of it a lot more too.
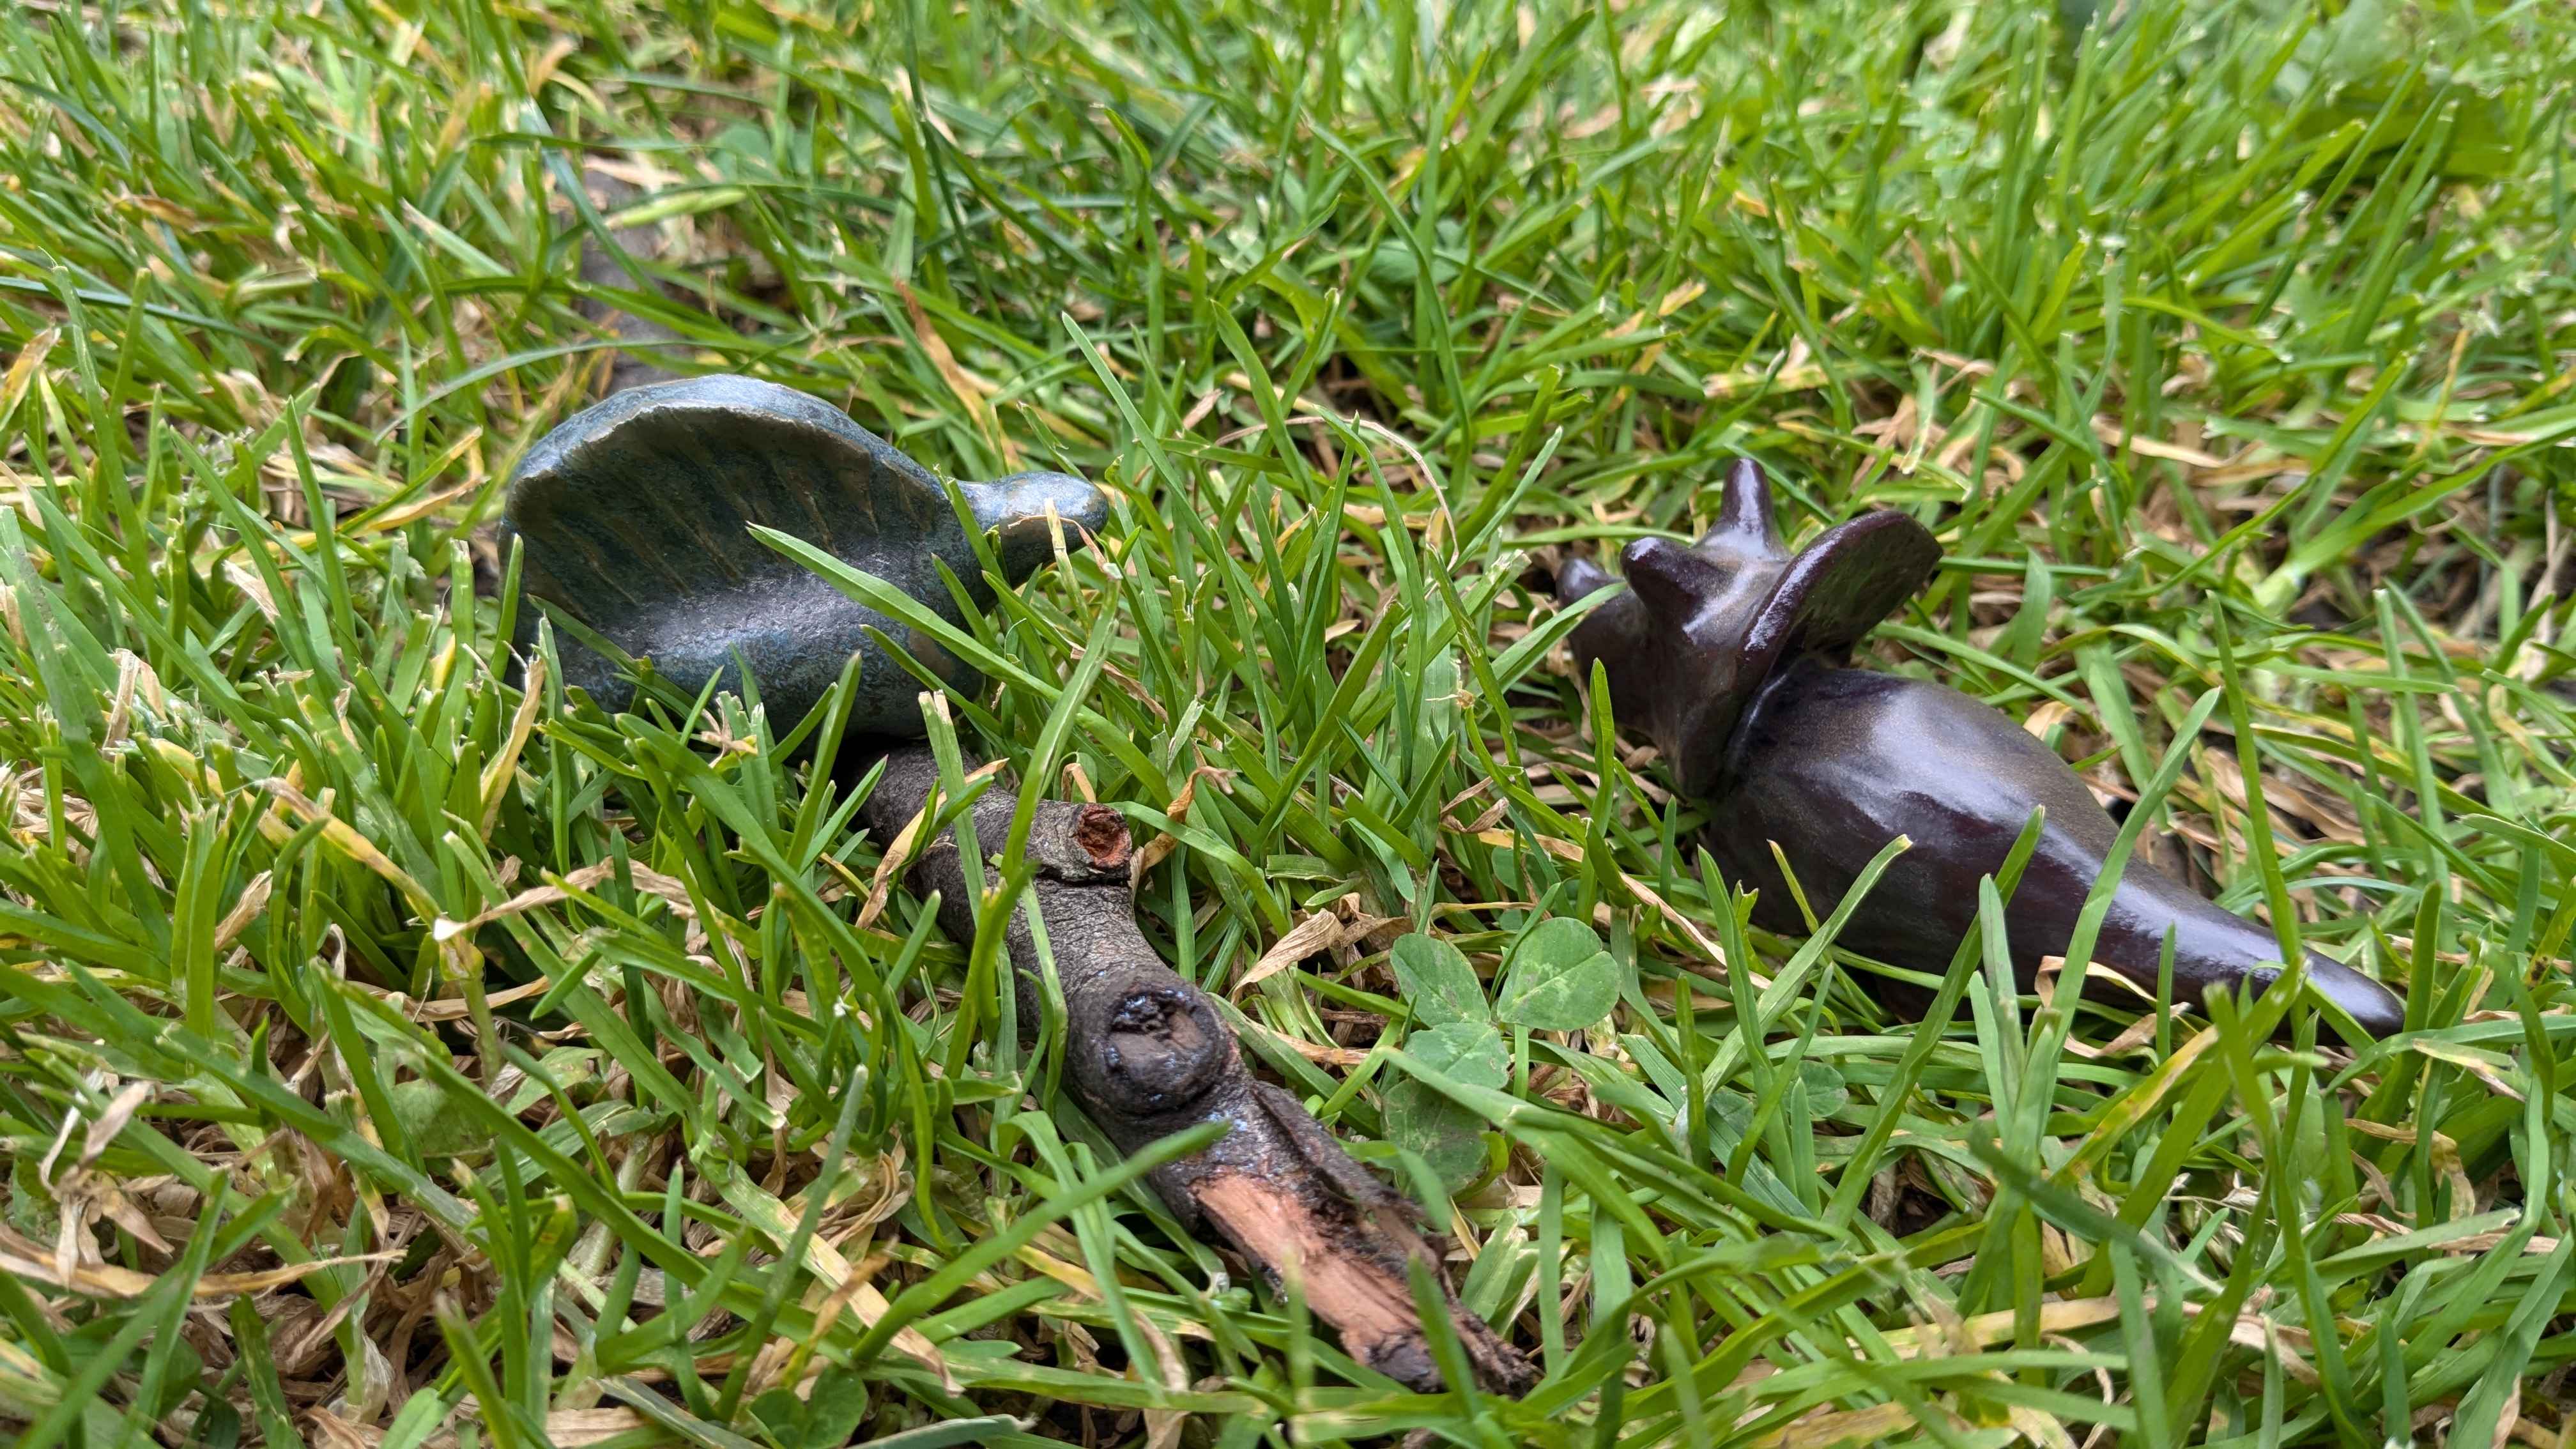
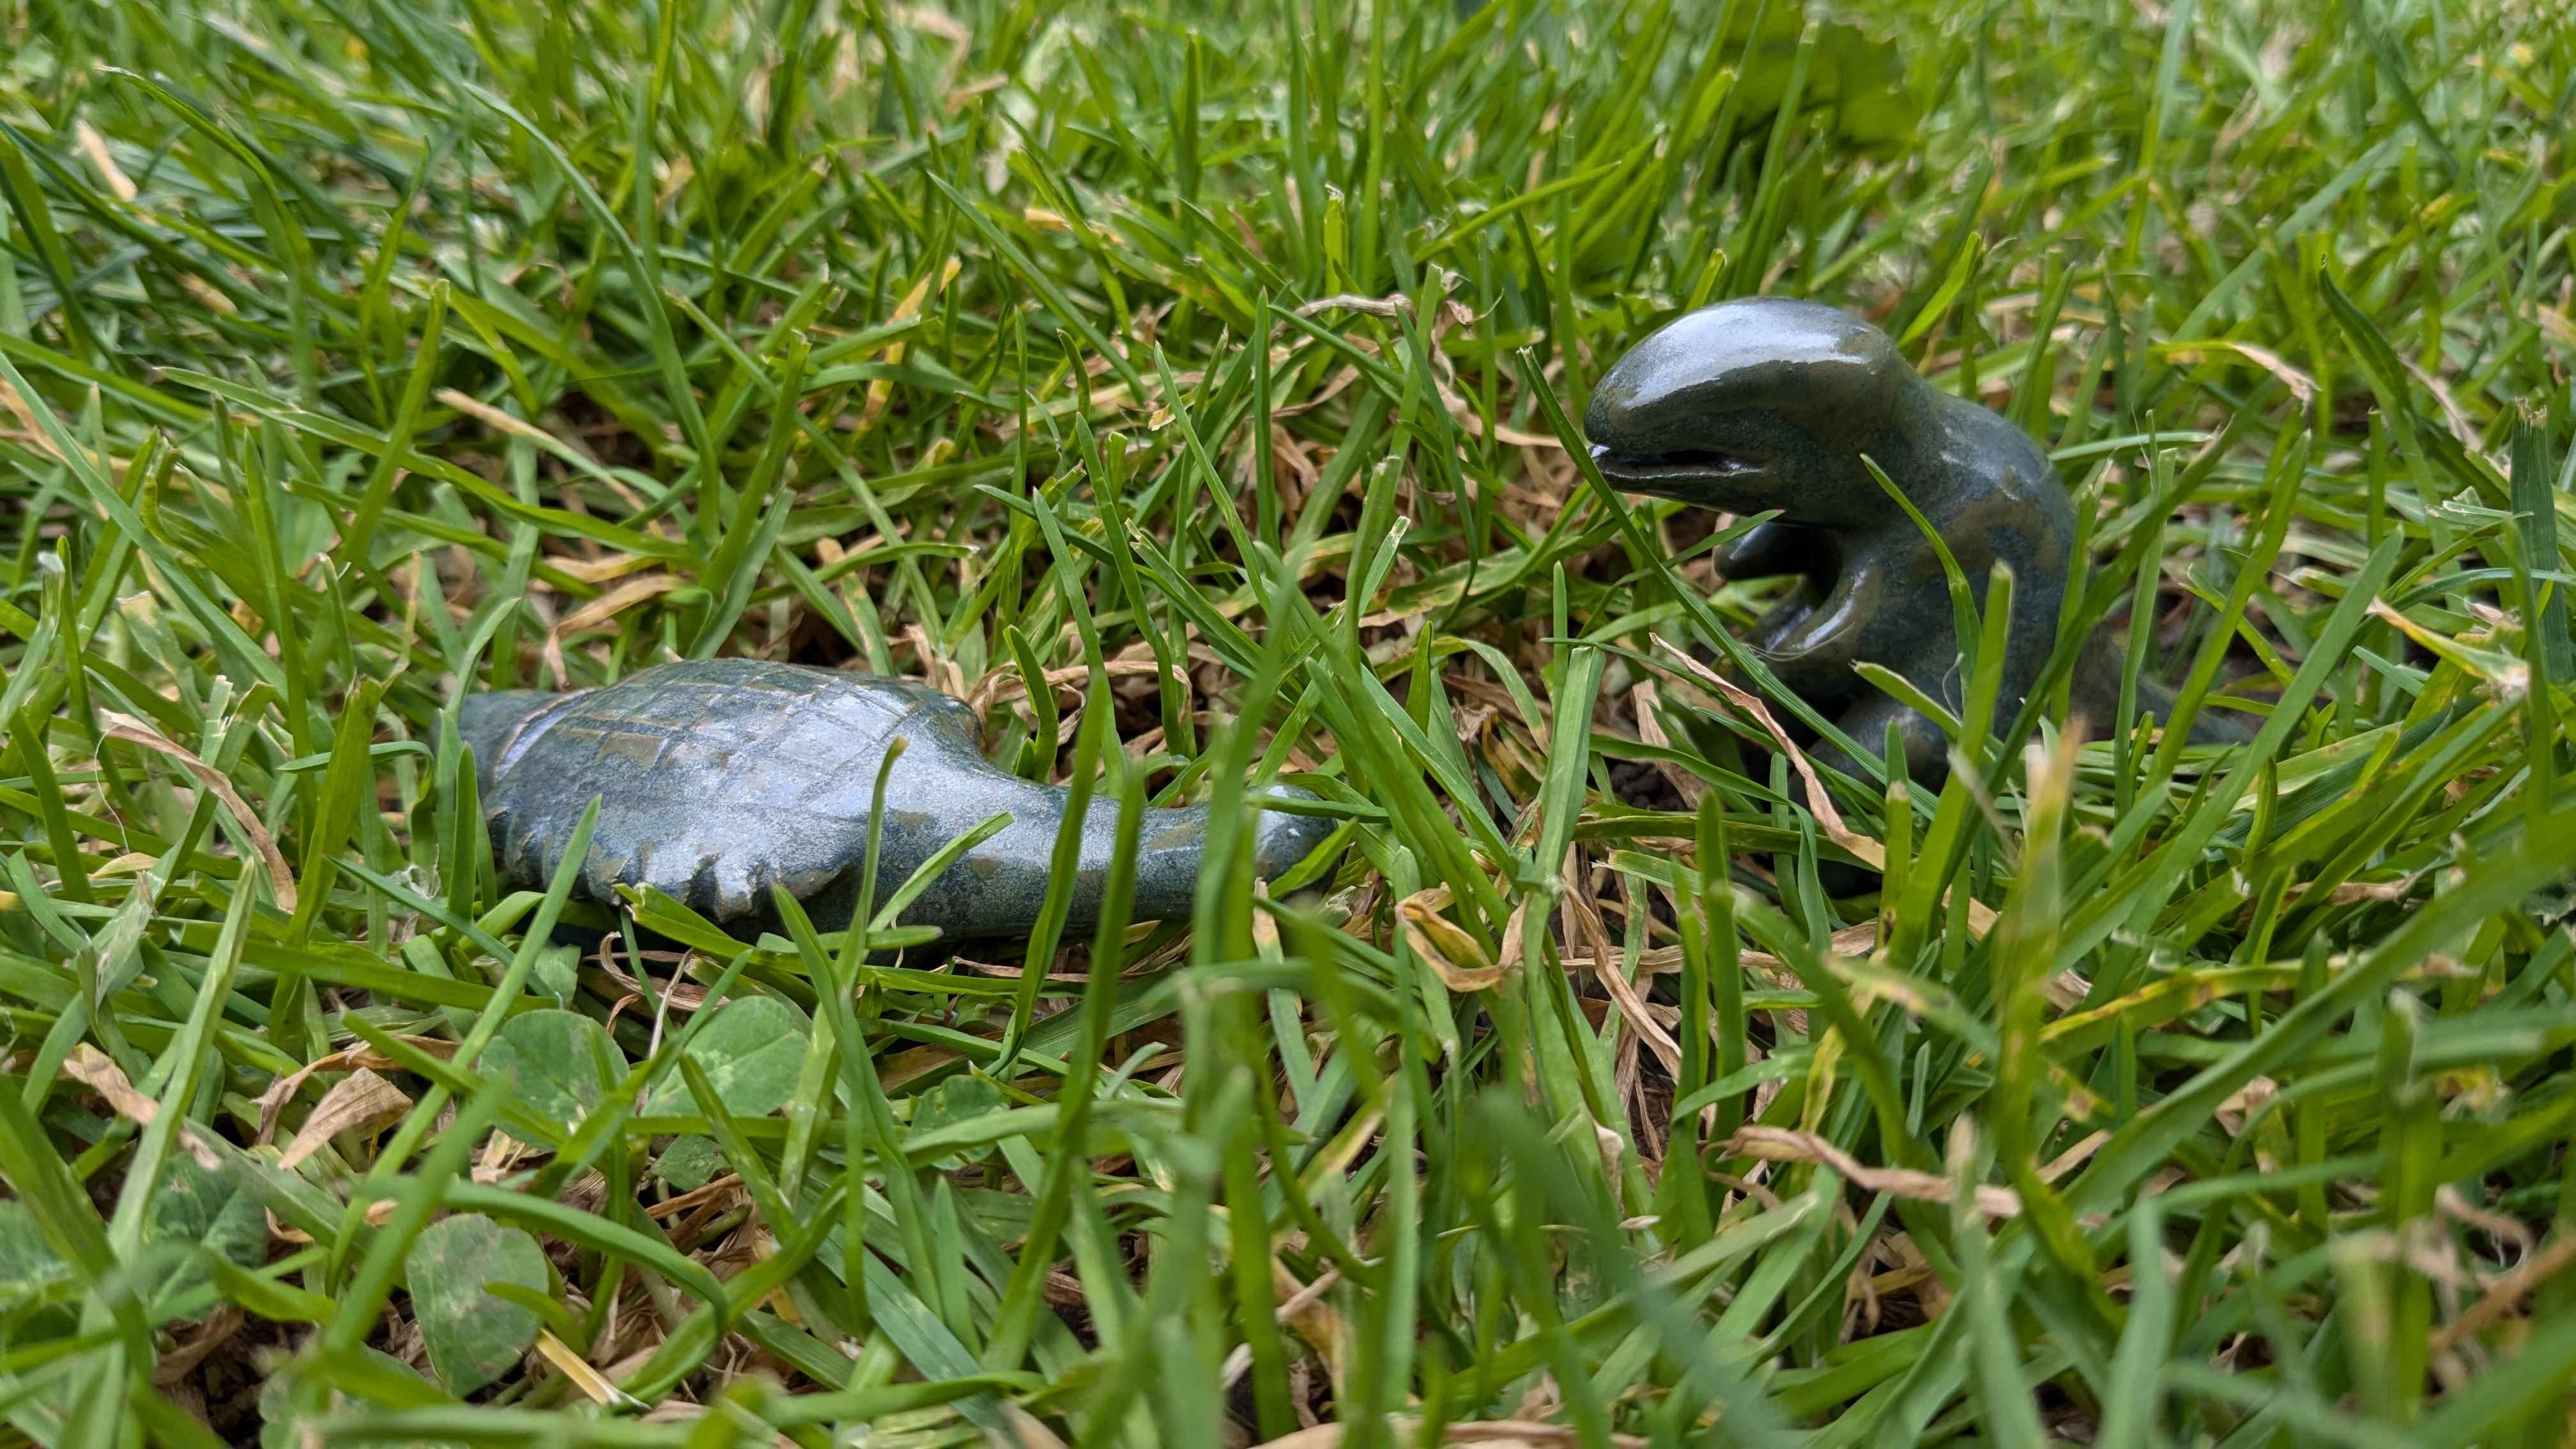
Using similar joining techniques for the heads, tails, and additional appendages, I made each of the other quadruped dinosaurs I could think of: triceratops, ankylosaurus, and a dimetrodon5. Ankylosaurus was easy except for etching in the grid of plates on its back. Dimetrodon, I happened to find a tool that could scoop out portions of its big fin on its back, which led to exactly the sort of glaze finish that I was looking for.
Triceratops was the hardest of those three by far, due to needing a large protruding front shield for the head while also needing a way to join the head to the rest of the body. I had some success across a few attempts at that shape. Sometimes I forgot to add enough clay to make the head look like it had a jaw at all, sometimes there wasn’t really a well-defined neck between the head and body, and sometimes all of that stuff worked but the shield for the head felt too flat instead of curving around to protect the body. I know that my dinos are abstract representations, but there’s a fine line between intentional simplification and simplification because of running up against a skill ceiling. I still haven’t discovered a great method for making them yet, even though I do like the ones I have.
I only recently figured out how to make a tripod like a tyrannosaurus or a parasaurolophus on its hind feet and tail for balance. I was really happy with how the jaw of the tyrannosaurus managed to stay open throughout both the bisque and glaze firings. The parasaurolophus and its classic triangular-shaped head took a couple tries. One attempt splayed the back legs way too wide and it looked like a linebacker, for instance. My most recent attempt, I managed to carve the foot into a sort of soft wedge. While standing on four legs, it uses one side of the wedge as the foot. Rocking backwards to make it balance on the other side of the wedged-foot, it can stand on the back two legs with its tail as an alternate mode.
I know there are more types of dinosaurs that I haven’t done yet, and I know this fact would deeply frustrate childhood me. Pachycephalosaurus is required for that reason. Iguanadon might be too similar to the pachy or the parasaur, but we’ll have to wait and see. There’s a whole genus of oviraptors and then also smaller raptors that might be too gangly and difficult to scale down and keep balanced, for me. And then I haven’t even started on aquatic dinosaurs like the plesiosaur or the megalodon6 at all. I don’t know when I’ll find the inspiration to take those ones on, but I’m sure I will eventually.
As with all creative endeavors in this era, there has been pressure from friends and family to turn this into a business, and for a while it felt like a good idea to try to make a part of this very blog into a storefront where you could purchase a dino like this. But then I remembered that that would mean not knowing who wound up with them. It would mean commodifying this art that I find joy in doing. It would mean having “will it sell” in the back of my mind for any decision from “which dino to do next?” to “what color glaze should I use?” so I have not chased that thread much. Maybe that’ll change someday.7 For now, it’s been fun, and I’ve been really happy with the results.
Footnotes
-
Because clay gets heated so hot in the kiln, it tends to crack on stress points where the clay is weakest. This tends to be where two separate pieces of clay are joined. Slipping is the process of adding very wet clay or water to clay to make it extremely soft and able to fill in cracks. Scoring is the process of making cuts into the clay where it’s going to be joined to have somewhere for the slip to squeeze in and bind to. Between the two, it can make what would normally be the weakest part of the piece hold its own against the intense heat. ↩
-
A brontosaurus pair that I brought to the raku firing workshop now sits on my desk at work. The black and white color of the raku crackle glaze goes nicely with any office vibe, I’ve found. ↩
-
Kilns turn glaze into a sort of molten liquid that slowly oozes around the piece depending on gravity, cohesion (glaze to itself), and adhesion (glaze to clay-body). When glaze touches kiln shelves, it pools and then turns back into a hard glass-like substance as the kiln cools. This can fuse the piece to the shelf, which tends to ruin both the piece and the shelf. ↩
-
It’s important when grinding chemicals like glaze into a powder that you do so with water added. Otherwise, this fine chemical dust can become airborne and find its way into your lungs and ruin your life. Much easier is to wet the piece and wet the sandpaper and then the dust stays wet and too heavy to be launched anywhere. Just make sure to clean it up before the powder dries. ↩
-
Technically, a dimetrodon is a type of lizard that’s more closely related to mammalian ancestors than to dinosaurs. I only recently learned this when looking at the wikipedia entry for them so that I could discover what the giant fin on their back was for. Turns out, we don’t know for certain! ↩
-
Also not a dinosaur, but a kind of shark. But still super old and recognizeable, so maybe! Who knows? ↩
-
Maybe if I can get my pterodactyls small enough and eye-hole-pierced enough that I could turn them into earrings or a pendant, that might be little enough work to produce and high enough reward to sell, separate from these figurines that I’d still make for pure joy. ↩